Getting started with Code Connect CLI
In this section, we’ll get you started with Code Connect CLI so you can start seeing your code snippets in Dev Mode. We’ll walk through the following:
- Install Code Connect CLI
- Use the interactive setup
- Publish your first components
- Understanding Code Connect files
- Discuss next steps
Before you begin
To use this guide, you need a design system codebase that contains components, and a Figma design library (a Figma file that contains your root design system components).
To follow along with the guide, you can optionally use the Simple Design System (SDS) provided by Figma. If you’d like to use the SDS:
- Open the Simple Design System community file in Figma and, when prompted, select Make a copy. The SDS community file contains the design system components.
- Clone the sds repository. The repository contains the code components that you’ll connect to your copy of the SDS file.
- After cloning, update the URLs in in the
documentUrlSubstitutionssection offigma.config.jsonto point to your Figma file. You only need to change the the file key (e.g.J0KLPKXiONDRssXD1AX9Oi) in the URLs.
Requirements
To install and use Code Connect, you must do the following:
- Install Node.js 18 or newer
- Generate a personal access token with the Code Connect scope set to Write and the File content scope set to Read.
Code Connect CLI Platform Versions
- Web (including React and HTML)
- Code Connect: v1.4.2
- iOS
- Code Connect for SwiftUI: v1.4.2
- Jetpack Compose
Set up dependencies (SwiftUI, Jetpack Compose)
To use Code Connect with SwiftUI and Jetpack Compose, you must also add Code Connect to your list of dependencies.
Important: These dependency steps are only for SwiftUI and Jetpack Compose. If you're getting started with other frameworks, you can skip to the next section.
SwiftUI
For SwiftUI, add Code Connect as a dependency in the initializer for your package, both for the project itself and for any relevant targets.
let package = Package(
    name: "ExampleProject",
    platforms: [...],
    products: [...],
    dependencies: [
        .package(url: "https://github.com/figma/code-connect", from: "1.0.0"),
    ],
    targets: [
      .target(
         name: "ExampleTarget",
         dependencies: [
               .product(name: "Figma", package: "code-connect")
         ]
      )
    ]
)
Jetpack Compose
For Jetpack Compose, update your build.gradle.kts file to include the Code Connect plugin, and add Code Connect as a dependency.
plugins {
    ...,
    id("com.figma.code.connect") version "1.+"
}
...
dependencies {
    ...,
    implementation("com.figma.code.connect:code-connect-lib:1.+")
}
Install the Code Connect command line tool
To use Code Connect, you first need to install the Code Connect command line tool. The command line tool lets you connect, publish, and unpublish your components. It also provides a setup wizard to ease getting started, and an AI mapping tool if your plan includes Figma’s AI tools.
The easiest way to install the command line tool is with Node Package Manager (npm). To install the command line tool, use:
npm install --global @figma/code-connect@latest
Privacy and Code Connect
Figma only collects the minimum data needed to enable Code Connect in the interface. When you run figma connect using the Code Connect command-line interface, Figma gets the following data:
- The paths for components that are added
- The repository URL where the Code Connect components are implemented
- The properties and code in the .figma files
Figma logs only basic events for understanding Code Connect usage: when components are published or unpublished, and calls to get Figma data when using the command-line interface.
For more information about Figma's approach to privacy, see Figma's Privacy Policy.
Use the interactive setup
Important: The interactive setup provided by Code Connect cannot be used with HTML components. HTML code components must be manually mapped to your design system components.
To help scaffold out your Code Connect files quickly, the Code Connect command line tool includes an interactive setup. The interactive setup walks you through the steps needed to connect your React components to the components in your design system.
To use the interactive setup:
- In the root of your repository, run the following command using your personal access token:
npx figma connect --token=PERSONAL_ACCESS_TOKEN
Where PERSONAL_ACCESS_TOKEN is your Figma personal access token.
Note: Optionally, you can use the FIGMA_ACCESS_TOKEN environment variable to pass your personal access token to the Code Connect command line tool. When using the env variable, you do not have to include --token.
The interactive setup appears in your terminal.
- The interactive setup prompts you to set the top-level directory for your code components. Enter the directory that contains your components relative to the root of your codebase. For example,
./src/ui.
If you’re using the sds repository, the top-level directories are already configured in the repository’s figma.config.json file and the interactive setup skips this step.
-
When prompted for the URL for your design system library, type the URL for the Figma file that contains your components. You must use the file that contains the root components for your design system, rather than a file that only contains component instances. For example,
https://www.figma.com/design/Z10uUjzFkYk06z50swsGzY. -
When asked if you want to create a
figma.config.jsonfile, press Enter to create the file. We’ll discuss the function and content of the file later in this guide.
If you’re using the sds repository or you’ve already created a config file, then the interactive setup skips this step.
- The interactive setup is ready to start mapping properties between your Figma file and the components in your repository. To use the default method of prop mapping, press Enter.
If your plan includes Figma’s AI features, you can optionally select Use AI for prop mapping. Using that method, Figma will intelligently build the prop mappings for you.
Important:
- AI prop mapping is only available for React components
- AI must be enabled in your team or organization’s Figma settings
- We do not store or use any of the data collected for AI training purposes
Using the method you selected, the interactive setup does its best to match Figma components from the file you provided with a corresponding code component:

The list in the terminal shows the Figma components and the corresponding code component that the tool identified as a match. For each match, the tool will create a separate Code Connect file.
To edit the links, use the arrow keys to move up and down the list. Press enter to select a component, and then you can navigate a list of available code components to find a match. The list can be filtered by typing. You can also enter none to remove the component from the list.
When you’re ready to continue, press esc.
-
The interactive setup prompts you to specify where you want the Code Connect files to be created. By default, the files will be created in the same directories as your code components. We recommend that you create a
figmadirectory for the Code Connect files. For example,./src/figma. -
The interactive setup asks you to confirm the operation. To create the Code Connect mappings, select Create files. Optionally, you can continue to edit the mappings, or exit the operation before creating any files.
When the interactive setup finishes, you can view the files that were created in the directory you specified, or using the list of files returned by the interactive setup.
The Code Connect files are created and the properties for your Figma components and code components are mapped. However, the matching code snippets aren't visible in Dev Mode yet. To make the code snippets visible, you need to publish the Code Connect files.
Publish Code Connect files
To view the Code Connect snippets for your components in Dev Mode, you need to publish the files first:
- In the root of your repository, run the following command using your personal access token:
npx figma connect publish --token=PERSONAL_ACCESS_TOKEN
Where PERSONAL_ACCESS_TOKEN is the access token for the Figma API that you generated.
Note: Optionally, you can use the FIGMA_ACCESS_TOKEN environment variable to pass your personal access token to the Code Connect command line tool. When using the env variable, you do not have to include --token.
Note: If the commands errors with a code 403, it's likely because you didn't update the urls in figma.config.json
The tool publishes your Code Connect files, returning a list of component names and URLs to the corresponding nodes.
-
To view the mapped components in Figma, click the links in the list after you publish. The links bring you to the corresponding components in your design system Figma file.
-
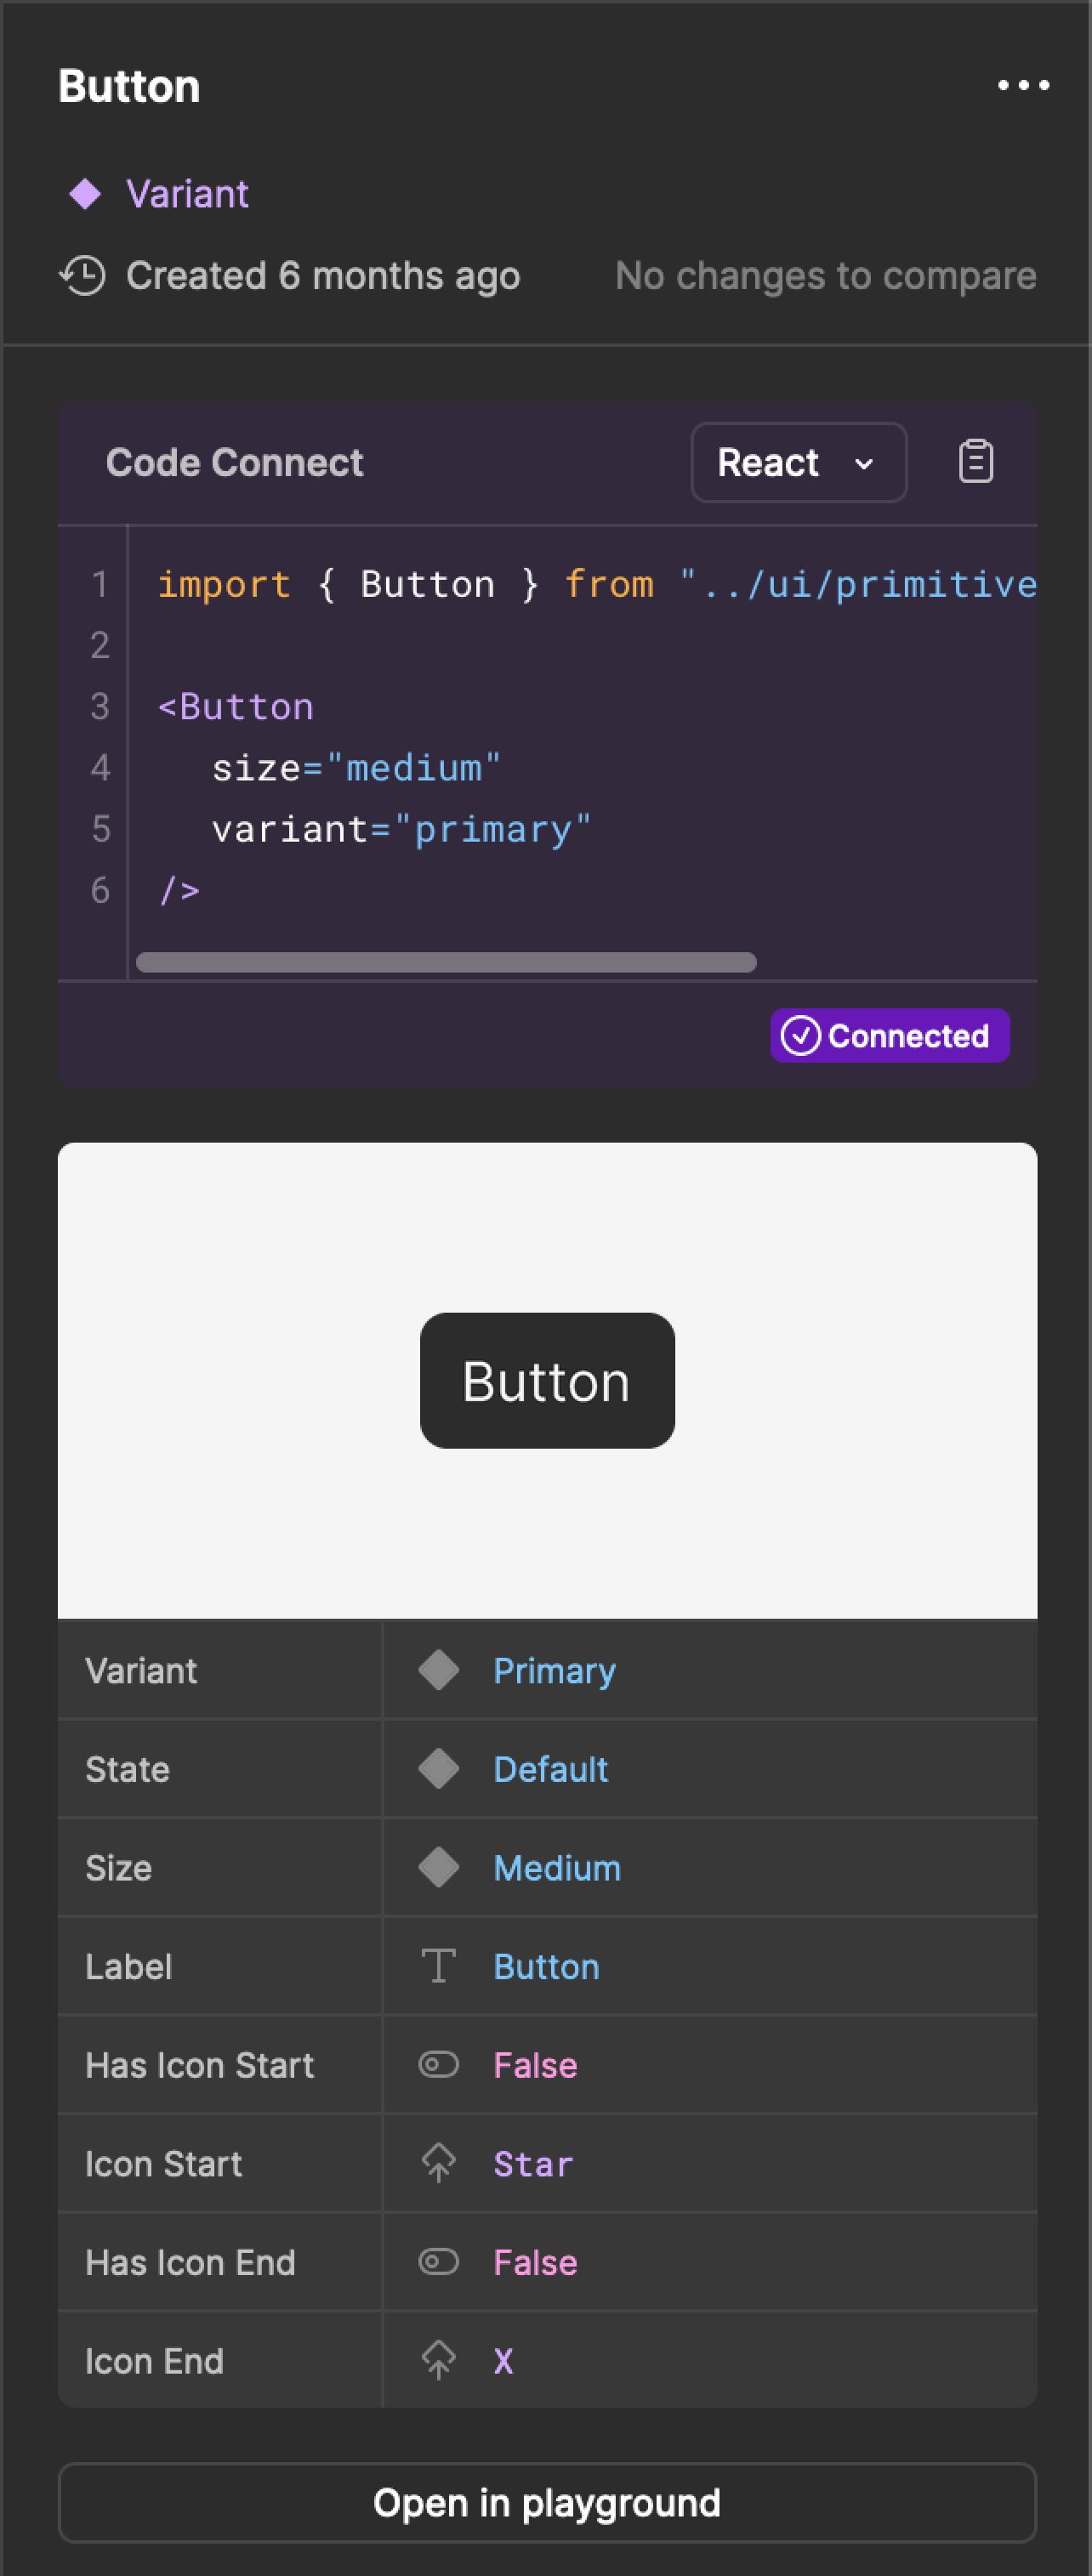
In the toolbar, click
 Dev Mode. The code snippet from Code Connect appears in the Inspect panel in the right sidebar.
Unpublish Code Connect files
If there are any issues with your mappings or you need to detach a component for any reason, you can unpublish a Code Connect file. To unpublish a file, use:
npx figma connect unpublish --node=NODE_URL --label=LABEL
Where NODE_URL is the URL of a specific node in your design system file, and label is the type to unpublish, e.g. "React" or "Vue".
Important: If you don’t specify a node URL, Code Connect will unpublish all of your components defined in your Code Connect files directory. If you ever have questions about other configurations that can be run, use the --help flag to list all the available flags.
Understand Code Connect files
After running the interactive setup, you’ll have a series of files named the following way:
component-name.figma.{tsx|kt|swift} (depending on framework)
Where:
component-namematches the name of the corresponding component in your codebase.figmaindicates that the file is a Code Connect file.tsx,kt, orswiftextension matches the framework used for the components. For example, if your codebase consists of React components, your Code Connect files usetsx.
If you didn’t set a directory for the files created by the interactive setup, your Code Connect files are located in alongside their matching components.
Here’s an example of a Code Connect file for a React component:
import React from "react"
import { Button } from "../ui/primitives/Button/Button"
import figma from "@figma/code-connect"

/**
 * -- This file was auto-generated by Code Connect --
 * `props` includes a mapping from Figma properties and variants to
 * suggested values. You should update this to match the props of your
 * code component, and update the `example` function to return the
 * code example you'd like to see in Figma
 */

figma.connect(
  Button,
  "https://www.figma.com/design/Z1bRs3WFkOz26z5bzwtBbA?node-id=65%3A5",
  {
    props: {
      hasIconStart: figma.boolean("Has Icon Start"),
      iconStart: figma.instance("Icon Start"),
      hasIconEnd: figma.boolean("Has Icon End"),
      iconEnd: figma.instance("Icon End"),
      label: figma.string("Label"),
      variant: figma.enum("Variant", {
        Primary: "primary",
        Neutral: "neutral",
        Subtle: "subtle",
      }),
      // No matching props could be found for these Figma properties:
      // "state": figma.enum('State', {
      //   "Default": "default",
      //   "Hover": "hover",
      //   "Disabled": "disabled"
      // }),
      // "size": figma.enum('Size', {
      //   "Medium": "medium",
      //   "Small": "small"
      // })
    },
    example: (props) => <Button />,
  },
)
This file was created by the interactive setup, using your choice for property mapping. The file includes the following sections:
Imports
At the top of the file is an import statement for Code Connect. The way Code Connect is imported in the file is based on the framework.
-
React
import figma from “@figma/code-connect” -
SwiftUI
import Figma -
Jetpack Compose
import com.figma.code.connect.FigmaConnect -
HTML/Web Components
import { html } from “@figma/code-connect/html”
The import statement lets the Code Connect API be used in the rest of the file. You also will want to import any of the component code to use in your examples later on.
This section may also include other import statements that are needed for your framework, such as import React from "react" for React.
figma.connect
The component in a Code Connect file is described using the figma.connect method. The method takes three arguments: the component imported from your codebase, the URL to the corresponding node in your design system file, and an object that defines the component’s properties and a usage example.
-
propsis an object that maps properties in your Figma file to properties of the component in your codebase. When you use the interactive setup, if there’s a property in your Figma file that isn’t included in your code component, Code Connect adds comments that describe the missing property. The mappings also describe the value types, such asfigma.stringandfigma.boolean.noteNote: Typically, when you see missing properties, it means that your code is either structured slightly differently or the properties have different names. Either way, it’s good to review these unmapped properties to see if they should be accounted for.
-
exampledefines how the corresponding code snippet is shown in Dev Mode. By default, the Code Connect files created by the interactive setup use your code component and the mapped props as the example.
Next Steps
Now that you’ve created your Code Connect files and you’re showing code snippets in Dev Mode, you’re ready for the next steps. Here are some things to try:
- Connect additional frameworks to your Design System Libraries (e.g. React for web and iOS for mobile)
- Build more complex property mappings (e.g. Create nested or shared properties)
- Install the VS Code extension to retrieve code connected components in your IDE