Libraries and Bundling
In the plugin manifest section, we covered how to set up a simple Figma project with all plugin code in a single file. For a basic plugin with limited functionality, having everything in one place makes sense. But all the code must be in one file, which doesn’t scale for very long. These days, most websites use hundreds of files and libraries in a single project.
Libraries are collections of prewritten code. They allow you to reuse common JavaScript functions or patterns in your own websites and applications.
Take a look at the following example:
<html>
  <head>
    <meta charset="UTF-8">
    <link rel="stylesheet" href="main.css">
    <script src="libraries/scripts.js" type="text/javascript"></script>
    <script src="https://code.jquery.com/jquery-3.3.1.slim.min.js" integrity="sha384-q8i/X+965DzO0rT7abK41JStQIAqVgRVzpbzo5smXKp4YfRvH+8abtTE1Pi6jizo" crossorigin="anonymous"></script>
    <script src="https://unpkg.com/react@18/umd/react.production.min.js" crossorigin></script>
    <script src="https://unpkg.com/react-dom@18/umd/react-dom.production.min.js" crossorigin></script>
  </head>
  <body>
  </body>
</html>
While <script> tags can be used to include multiple libraries, having hundreds of these tags would not be the most efficient way to include your project dependencies. A common solution is to bundle all code and dependencies into one file. Because everything is technically in one file, bundling can optimize your project by making less server requests.

Bundling with Webpack
Webpack is a widely used JavaScript library and module bundler that packages your project files for use in a browser. Loading scripts individually in a web app can be very costly and Webpack can improve a project’s load speed by bundling script files. Instead of making multiple requests, a bundle of script files only needs to be requested once. In this section, we’ll go over how you can bundle your projects with this tool. We are going to:
- Install Webpack
- Setup Typescript with Webpack
- Create a bundle
- Import modules
We recommend taking a look at the Plugin Quickstart Guide before using Webpack to install other dependencies required to build a Figma plugin.
Install Webpack
- Open your project folder in Visual Studio Code.
- Go to Terminal > New terminal to open a command line window in VS Code.
- In the terminal, run the following commands. These commands will save Webpack to your current project and install other dependencies into your project:
npm install
npm install webpack webpack-cli --save-dev
If the commands are successful, the node_modules folder is created in Visual Studio Code and Webpack is added to our list of devDependencies in package.json.

If you followed our Plugin Quickstart guide, you’ll already have a node_modules folder in your project.
Setup Typescript with Webpack
We recommend using Typescript for developing Figma plugins. In order for our plugin to compile properly, we need to configure Webpack to use Typescript.
- Install the Typescript compiler and loader by running the following command. You can verify the installation by checking that
ts-loaderis now under the list of dependencies inpackage.json.
npm install --save-dev typescript ts-loader
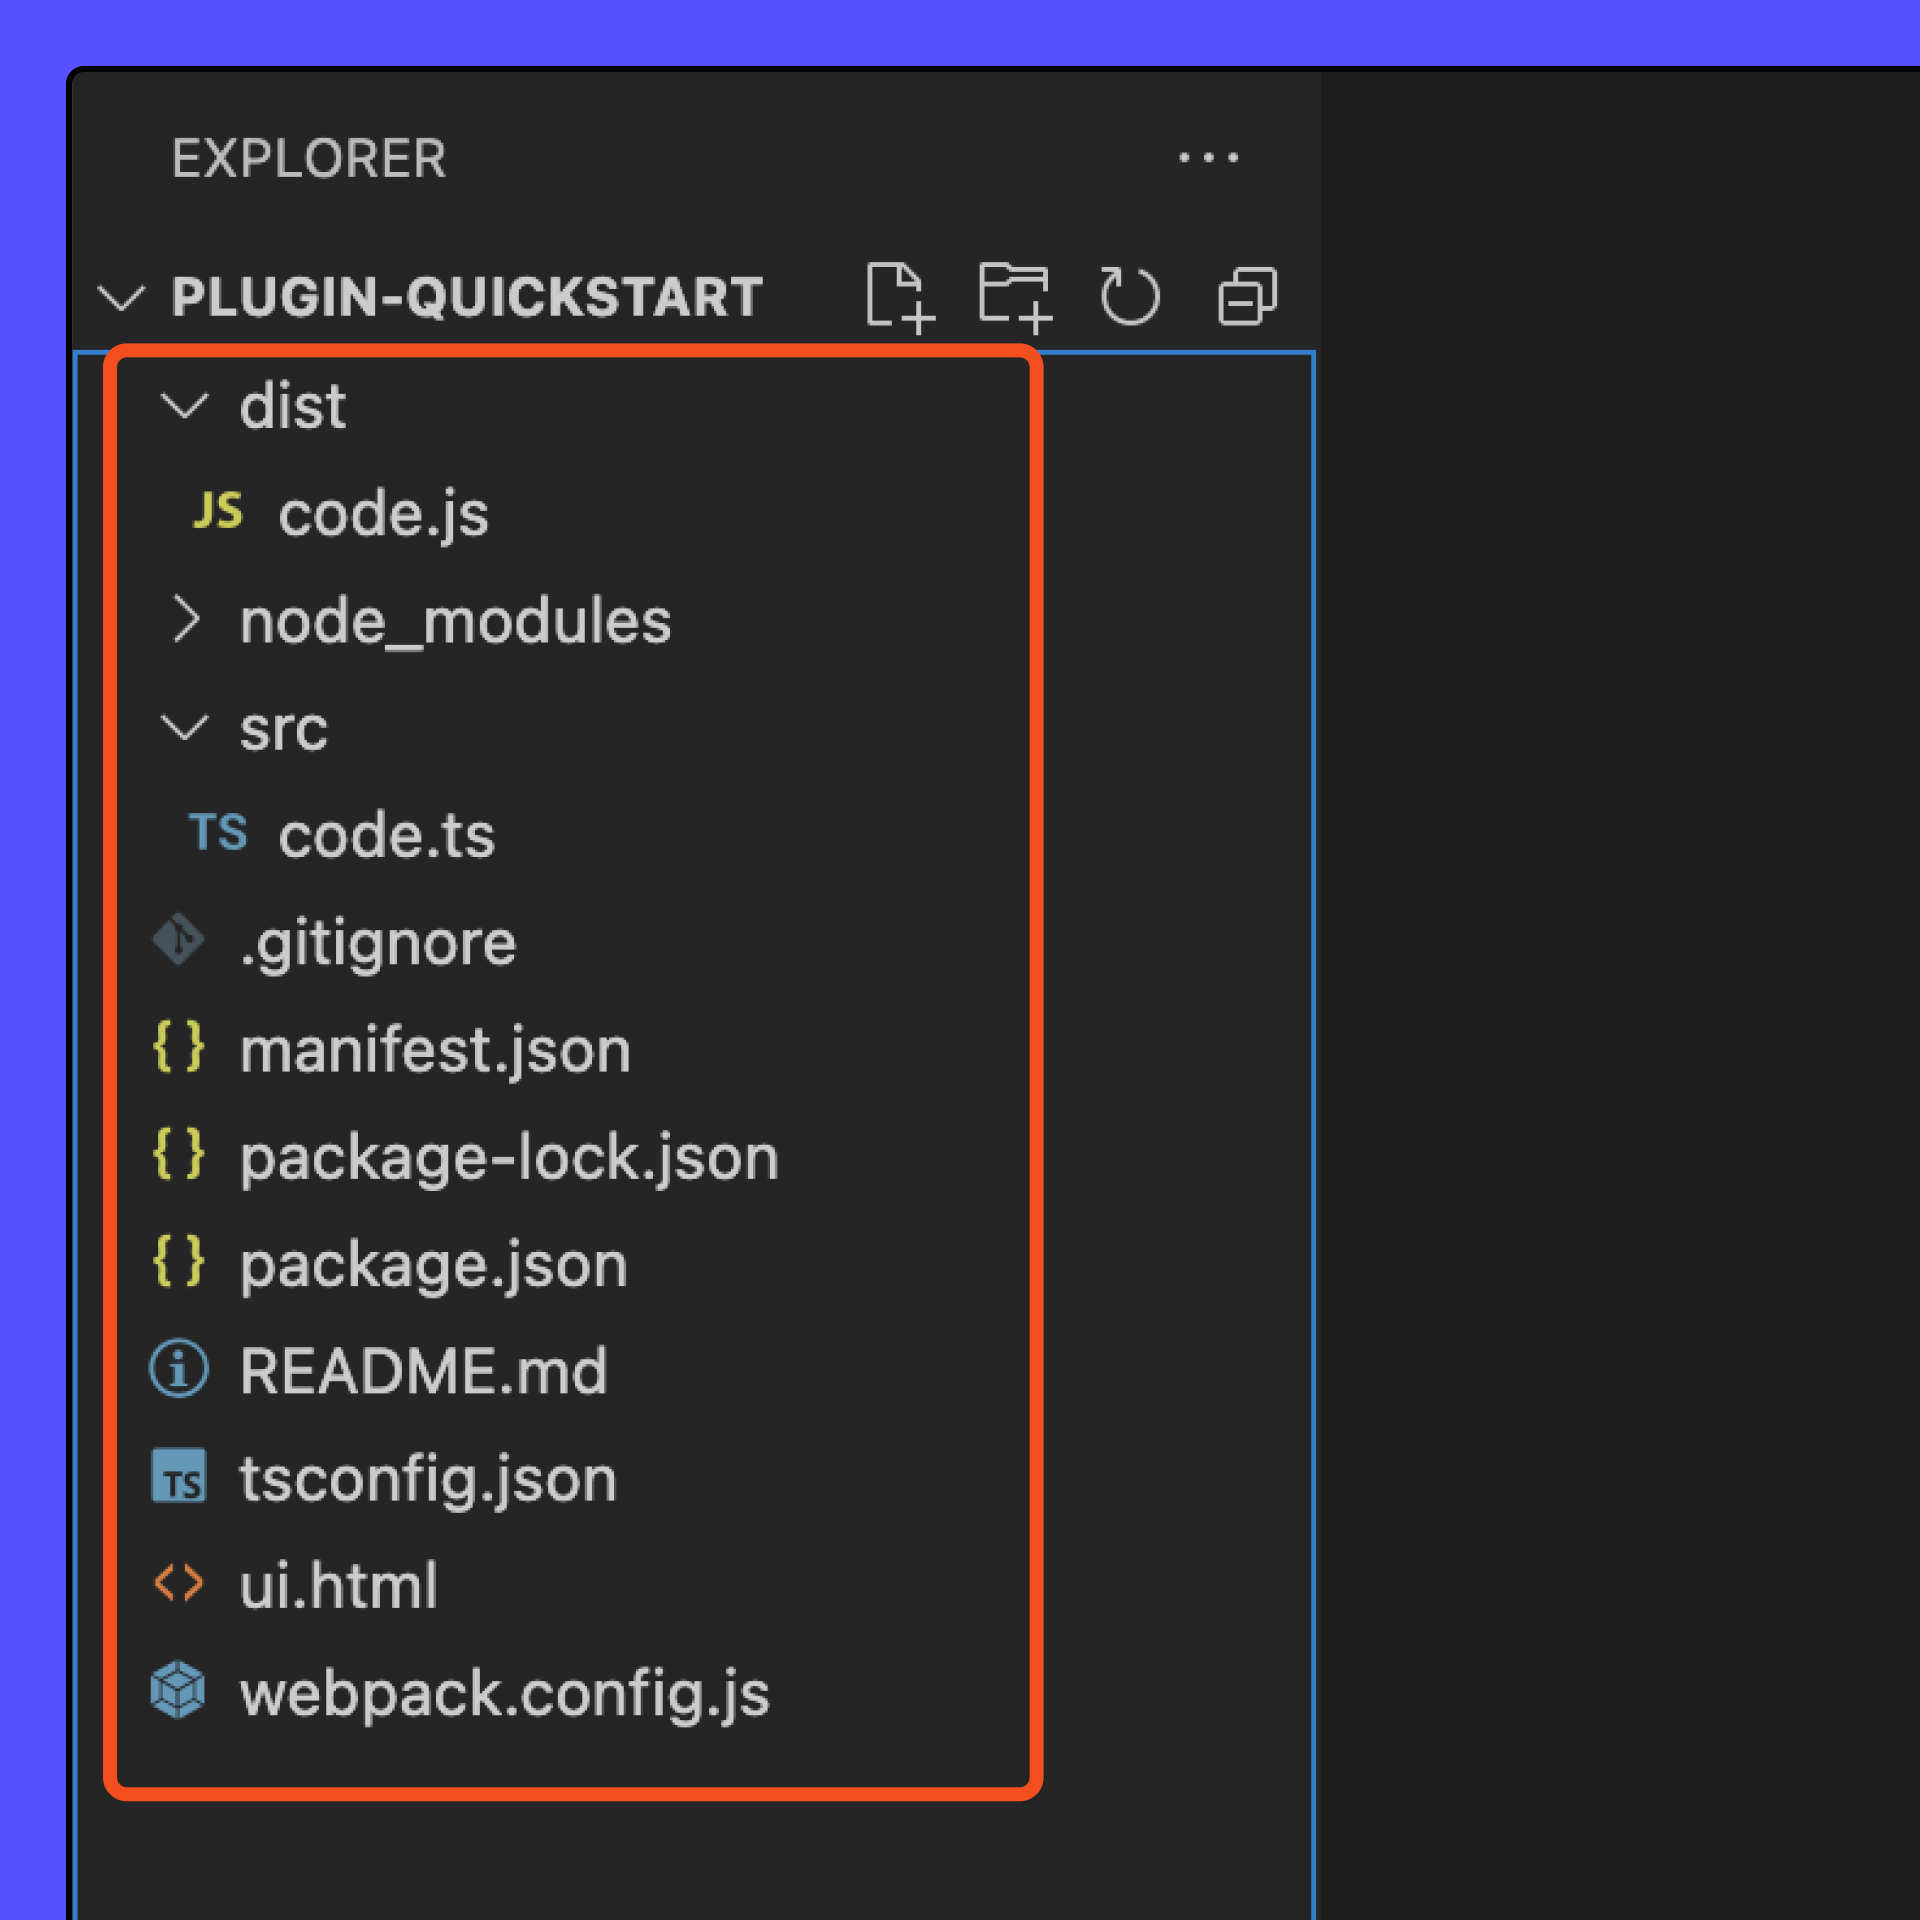
- Now, we’ll change up the project structure by creating a directory named
dist. Right-click in the file explorer and select New Folder…

- Then, drag
code.jsand drop it into the newdistdirectory. - Create another directory named
srcthen movecode.tsinto it. Our updated project structure should look something like this:

- Since we changed the location of our
code.js, we also need to update themainfield inmanifest.jsonto reflect the change:
// manifest.json

{
  "name": "bundling-test2",
  "id": "1174728261122583026",
  "api": "1.0.0",
  "main": "dist/code.js",
  "editorType": [
    "figma",
    "figjam"
  ]
}
- Open
package.jsonthen updatebuildto"webpack". This will allow us to run a webpack build with a simple terminal command.
// package.json
...
"scripts": {
  "build": "webpack",
  "watch": "npm run build -- --watch"
},
...
- Then, open
tsconfig.jsonand replace it with the following. This sets our compiler options to include Typescript files from thesrcfolder and assignsdistas the output directory.
// tsconfig.json
{
  "compilerOptions": {
    "target": "es2020",
    "lib": ["es2020"],
    "strict": true,
    "typeRoots": [
      "./node_modules/@types",
      "./node_modules/@figma"
    ],
    "outDir": "./dist",
    "jsx": "react",
    "allowJs": true,
    "moduleResolution": "node"
  },
  "include": ["src/**/*.ts"]
}
The "target": "es2020" setting tells TypeScript to emit modern JavaScript syntax that the plugin sandbox natively supports — optional chaining (?.), nullish coalescing (??), BigInt, and more — without unnecessary downcompiling. Setting "lib": ["es2020"] gives you accurate type definitions for these built-ins. If you are bundling with Babel or another transpiler that targets older browsers for a UI iframe, configure that tool separately; the tsconfig.json here only applies to your plugin's main thread code.
- Since the Figma desktop app works a little differently than the browser, we need to add some Webpack configurations. We are going to create a
webpack.config.jsfile at the root of our project.

- Copy the following code and add it to your
webpack.config.jsfile:
const path = require('path');
const webpack = require('webpack');

module.exports = (env, argv) => ({
mode: argv.mode === 'production' ? 'production' : 'development',

// This is necessary because Figma's 'eval' works differently than normal eval
devtool: argv.mode === 'production' ? false : 'inline-source-map',
  entry: {
    code: './src/code.ts' // This is the entry point for our plugin code.
  },
  module: {
    rules: [
      // Converts TypeScript code to JavaScript
      {
        test: /\.tsx?$/,
        use: 'ts-loader',
        exclude: /node_modules/,
      },
    ],
  },
  // Webpack tries these extensions for you if you omit the extension like "import './file'"
  resolve: {
    extensions: ['.ts', '.js'],
  },
  output: {
    filename: '[name].js',
    path: path.resolve(__dirname, 'dist'),
  },
});
If you want to learn more about how webpack.config.js works, we recommend reading the Webpack documentation →
After all the changes, our project structure should look something like this:
- Now, our Webpack modules should compile and our plugin should run properly. Save all your changes, then run a build of the project by running
npm run buildin the terminal. You’ll see a success message if the modules compiled with no errors.

-
Check that your plugin runs in the Figma desktop app by going to Plugins > Development then selecting your plugin.
If you are working with the starter code from the Plugin Quickstart Guide, you’ll see five orange rectangles in the canvas.

Create a bundle
Now that we have Webpack installed and integrated with Typescript, we can start splitting up our plugin code into multiple files. This can be done through the use of JavaScript modules. A module is a bundle of code that can export functionality to other modules and import functionality from other modules.
In this section, we’ll take a look at how we can import and export modules between files.
-
Cut the following lines of code from
code.ts:const rect = figma.createRectangle();
rect.x = i * 150;
rect.fills = [{type: 'SOLID', color: {r: 1, g: 0.5, b: 0}}];
figma.currentPage.appendChild(rect);
nodes.push(rect); -
In
rectangle-module.tscreate an exported function namedcreateRectangles()and paste in the code fromcode.ts:export function createRectangles(i:number, nodes: SceneNode[]) {
const rect = figma.createRectangle();
rect.x = i * 150;
rect.fills = [{ type: "SOLID", color: { r: 1, g: 0.5, b: 0 } }];
figma.currentPage.appendChild(rect);
nodes.push(rect);
} -
Then, go back to
code.ts. At the top of the file, create an import statement for thecreateRectanglesfunction:import { createRectangles } from "./rectangle-module" -
Finally, in
code.tscall thecreateRectanglesfunction under thenodesdeclaration:const nodes: SceneNode[] = [];
for (let i = 0; i < msg.count; i++) {
createRectangles(i,nodes);
} -
Save your changes, then run a build of the project using
npm run build. -
Run your plugin again in the Figma desktop app. The plugin should work the same way, but with Webpack bundling our modules together behind the scenes. Rather than making requests to multiple TypeScript files, a single request is made to
code.ts.
If you have issues running your plugin after creating modules, check that you have an export statement in your createRectangles() function and that your import statement in code.ts is correct.
Import all modules
You can further simplify your import statements by importing everything from a library:
import * as MyCode from "./rectangle-module";
MyCode is the alias for our library. This is what we’ll use to reference the file and the pre-written code from it. Update your createRectangles function call to reflect the new import:
MyCode.createRectangles(i, nodes);
The concept of importing and exporting modules is the basic idea behind bundling. You can see how in a larger project, importing modules from a library saves you time and prevents redundancies in your code.
Webpack only understands JavaScript and JSON, so HTML and CSS files are converted into modules in a format that a browser can consume.
To see what bundling with Webpack and React looks like for a Figma plugin, take a look at the Webpack sample directory in the plugin-samples repository. This may require additional Webpack configuration.
Learn more about these concepts on the Webpack JS website →
Using Plugma
Plugma is a community-created toolkit to create plugins with support for common frameworks and additional development tools. To get started run the following command and follow the prompts:
npm create plugma@latest
For more information on what Plugma offers you can visit their documentation.
Plugma is a third-party library and not officially maintained by the Figma team.
Using Create Figma Plugin
Create Figma Plugin is a community-created toolkit to create plugins with bundling, UI components, and helpful utilities configured out of the box. To get started, run the following command and follow the prompts:
npx --yes create-figma-plugin
For more information on what Create Figma Plugin offers you can visit their documentation.
Create Figma Plugin is a 3rd party library and not officially maintained by the Figma team.
ai-plugin-template
If you want to create a plugin that integrates with OpenAI we have an official Figma starter template that uses Next.js that can get you up and running.
To get started run the command below in your terminal and follow the instructions in the generated README.md file:
npx create-next-app@latest --example https://github.com/figma/ai-plugin-template/
To learn more you can visit the repository here.
Bundling with Esbuild
Esbuild is a JavaScript bundler built with Go that is even faster than Webpack. Much like Webpack, Esbuild converts your files into modules then creates a bundle for the browser to consume. Esbuild also supports Typescript and JSX out of the box, so you don’t need to worry about these extra configurations.
Learn more about bundling with Esbuild on their website →
There are a lot of bundling tools out there, so feel free to use the module bundler you feel is best for your project. Take a look at this esbuild-react example in our plugin-samples repository.