Plugins for Code Generation
Plugins in Dev Mode can extend Figma's native code snippets to generate code for languages or frameworks that Figma doesn’t support, or to surface metadata that a front-end developer might find useful when implementing a design in code (e.g. where to import icons in a codebase or internationalization string extraction).
Plugins in Dev Mode specifically built for code generation ("codegen") appear in the Figma's native language dropdown. Once selected from this menu, the figma.codegen.on("generate") callback will get called any time the user's selection changes.

Considerations about how pages are loaded in the document still apply to plugins that generate code. However, as plugins for codegen act on the user's current page, it's unlikely you'll need to worry about loading additional pages.
Check out the Working in Dev Mode guide for a general overview of Dev Mode and how to build plugins for Dev Mode
Getting started
If you're building a plugin for code generation, your manifest should specify:
"dev"as an editor type"codegen", "vscode"as capabilities- At least one supported language via the
"codegenLanguages"field. You may list multiple languages if your plugin supports more than one code language.
{
  "name": "MyCodegenPlugin",
  "id": "{your id here}",
  "api": "1.0.0",
  "main": "code.js",
  "editorType": ["dev"],
  "capabilities": ["codegen", "vscode"],
  "codegenLanguages": [
    {"label": "React", "value": "react"},
  ]
}
You can also specify custom preferences for your plugin via the "codegenPreferences" field. These preferences allow users of your plugin to customize the codegen output and can be read by the plugin via the figma.codegen.preferences API.
There are 3 types of codegen preferences:
| itemType | description |
|---|---|
"unit" | This is useful if your plugin supports a scaled unit. |
"select" | This is useful if your plugin supports customizations from a fixed set of options. |
"action" | This is useful if you need more customization options and want to open an iframe. |
Scaled unit codegen preferences
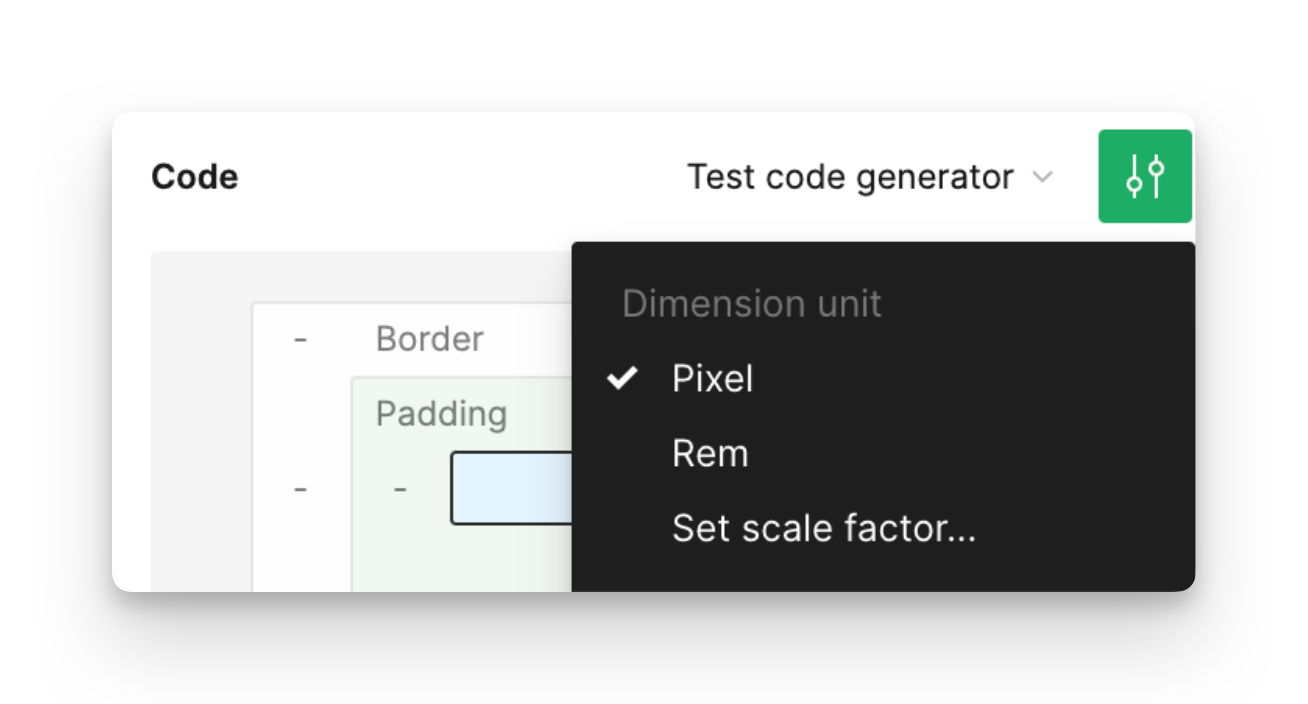
By default, all codegen languages should support a pixel unit. However, in a lot of cases, it makes more sense to write code using a scaled unit. If applicable, plugins can use this preference option to define properties of a scaled unit and whether to default to it. For every code language your plugin supports, this option should be defined at most once in your manifest, and it will be accessible to users from a settings menu in the Code section of the Inspect panel in Dev Mode.
The callback for figma.codegen.on("generate") is automatically called whenever unit preferences are changed. Inside the callback, you can access figma.codegen.preferences to condition the generated code accordingly.
As an example, this test plugin supports a Rem scaled unit.
Select codegen preferences
These are useful for providing multiple choice options to users to allow them to customize the generated code. For example, a plugin might choose to support custom formatting options.
The callback for figma.codegen.on("generate") is automatically called whenever any selected preferences are updated. Inside the callback, you can access figma.codegen.preferences to modify the generated code accordingly.
Action codegen preferences
Action codegen preferences are useful if you need more than a custom scaled unit or multiple choice preference options for your plugin. "Action" preferences allow you to open an iframe (via figma.showUI) to support even more user preferences. When selected, the figma.codegen.on("preferenceschange") callback will get called.
Any preferences inside the iframe will need to be stored and managed by your plugin using something like figma.clientStorage. Additionally, when these custom preferences change, you need to manually call figma.codegen.refresh to make sure the displayed code is updated.
A simple example
Here is a simple codegen plugin that returns the selected node's name in the Code section of the Inspect panel in Dev Mode:
// Make sure that we're in Dev Mode and running codegen
if (figma.editorType === "dev" && figma.mode === "codegen") {
  // Register a callback to the "generate" event
  figma.codegen.on("generate", ({ node }) => {
    return [
      {
        title: "Section Title",
        language: "PLAINTEXT",
        code: "Generated code for " + node.name + " goes here"
      }
    ]
  })
}
The "generate" callback will be fired whenever the selection changes and whenever codegen preferences are updated. The callback you provide to this function will take a CodegenEvent as a parameter and return either a CodegenResult[] or a Promise<CodegenResult[]>.
The callback registered by figma.codegen.on("generate") has a timeout of 3 seconds and returns an error
if it times out. For more information, see the figma.codegen.on API
Examples
Plugin manifest with multiple languages
{
  "name": "MyPlugin",
  "id": "{your id here}",
  "api": "1.0.0",
  "main": "code.js",
  "editorType": ["dev"],
  "capabilities": ["codegen"],
  "codegenLanguages": [
    {"label": "React", "value": "react"},
    {"label": "Typescript", "value": "typescript"}
  ],
  "codegenPreferences": [
    {
      "itemType": "unit",
      "scaledUnit": "Rem",
      "defaultScaleFactor": 16,
      "default": true,
      "includedLanguages": ["react"]
    },
    {
      "itemType": "select",
        "propertyName": "tabSize",
        "label": "Tab Size",
        "options": [
          {"label": "2", "value": "2", "isDefault": true },
          {"label": "4", "value": "4"},
          {"label": "8", "value": "8"}
        ],
        "includedLanguages": ["typescript"]
    },
    {
        "itemType": "action",
        "propertyName": "showMore",
        "label": "More settings...",
        "includedLanguages": ["typescript"]
    }
  ]
}
Multiple code sections
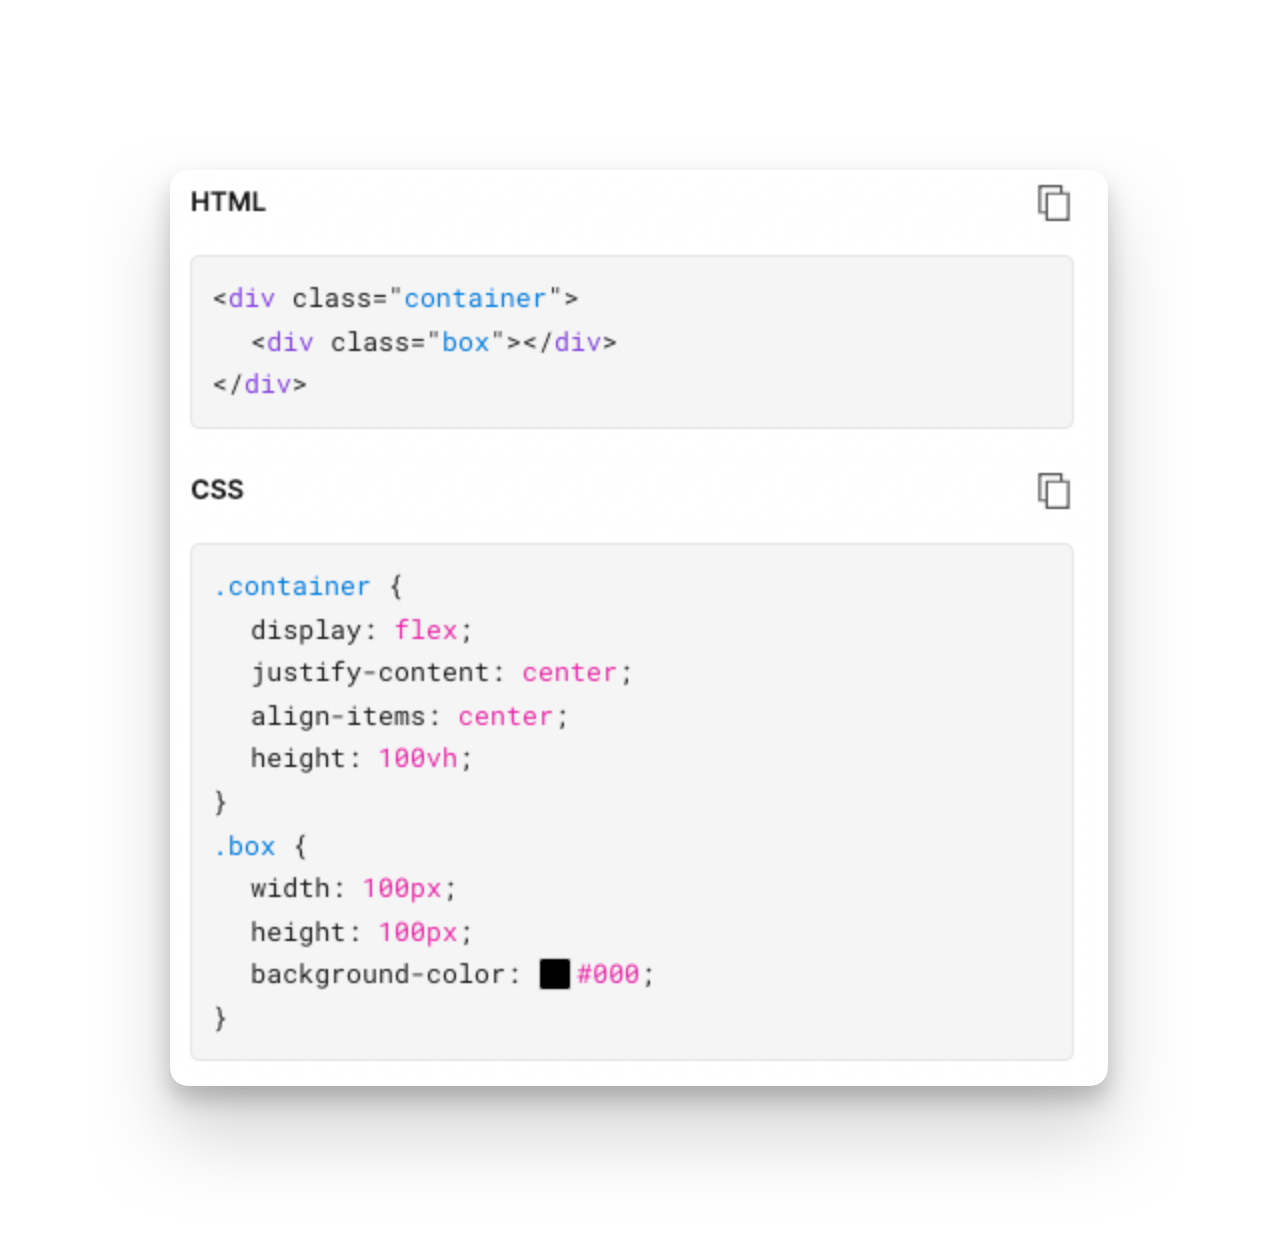
When building a plugin for code generation, it's possible to organize your generated code into different sections, so that they are easier to read and copy by front-end developers. In the example below, we return an HTML section and a CSS section where the HTML section uses the classnames declared by the CSS section.
figma.codegen.on("generate", () => {
  return [
    {
      language: "HTML",
      code:
        `<div class="container">
          <div class="box"></div>
        </div>`,
      title: "HTML",
    },
    {
      language: "CSS",
      code:
        `.container {
            display: flex;
            justify-content: center;
            align-items: center;
            height: 100vh;
          }
          .box {
            width: 100px;
            height: 100px;
            background-color: #000;
          }
        `,
      title: "CSS",
    },
  ];
});
Here's how the above example would appear in the Inspect panel in Dev Mode:
Using figma.showUI for code generation
figma.showUI is not allowed within the generate callback. Instead, if figma.showUI is required in the generate callback, the showUI call should be moved outside of the callback and figma.ui.postMessage should be used within the callback instead. This ensures that the plugin is able to handle concurrent "generate" events.
let nextMessageIndex = 1;
const resolveByMessageIndex: Record<
  string,
  (response: CodegenResult[]) => void
> = {};

figma.showUI(
  `
<script>
  window.onmessage = async (event) => {
    const { messageIdx, cssStr } = event.data.pluginMessage
    // Do code generation here:
    parent?.postMessage(
      {
        pluginMessage: {
          type: "RESULT",
          result: "Result for " + cssStr,
          messageIdx,
        },
      },
      "*"
    );
  }
</script>
`,
  { visible: false },
);

figma.ui.on("message", (msg) => {
  if (msg.type === "RESULT") {
    resolveByMessageIndex[msg.messageIdx]?.([
      {
        language: "PLAINTEXT",
        code: msg.result,
        title: "Result from iframe",
      },
    ]);
    delete resolveByMessageIndex[msg.messageIdx];
  }
});

figma.codegen.on("generate", async ({ node }) => {
  const messageIdx = nextMessageIndex++;
  return new Promise(async (resolve) => {
    const cssProps = await node.getCSSAsync();
    const cssStr = Object.entries(cssProps)
      .map(([k, v]) => `${k}: ${v};`)
      .join("\n");
    resolveByMessageIndex[messageIdx] = resolve;
    figma.ui.postMessage({
      messageIdx,
      cssStr,
    });
  });
});
Using properties on the CodegenEvent
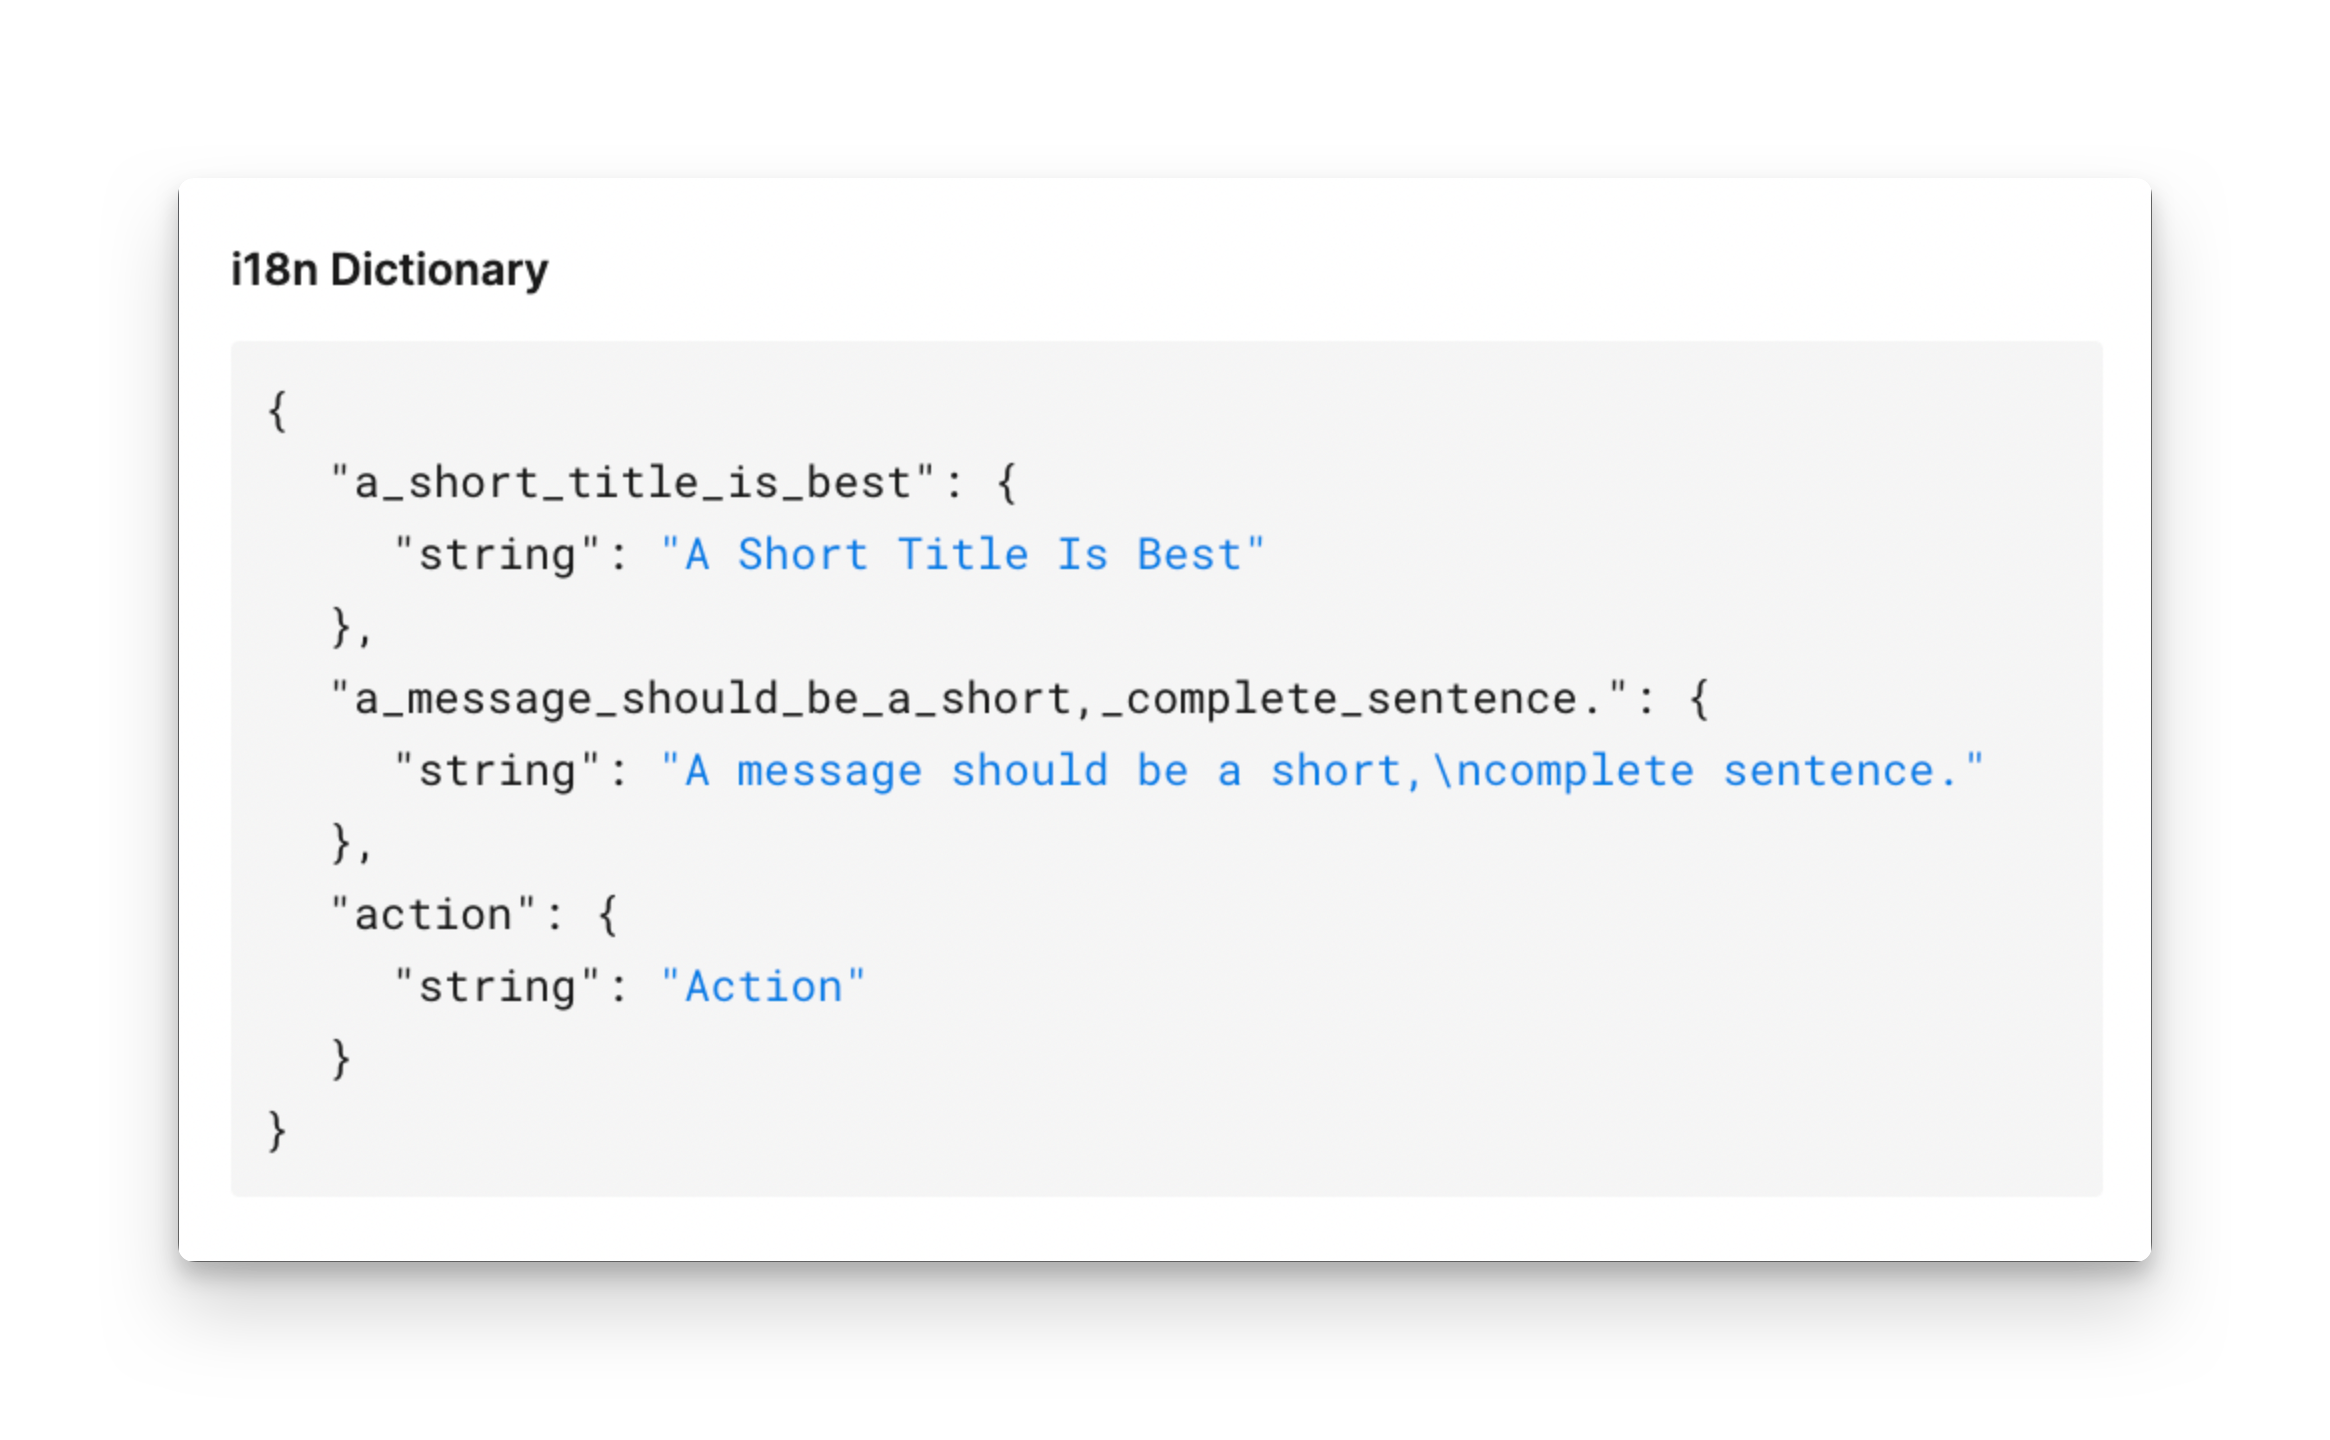
Often front-end developers will need to pull out strings for an internationalization dictionary when doing application development. Below is a codegen plugin that gets all of the Text Nodes in a user's current selection and builds a JSON dictionary of them.
figma.codegen.on("generate", (eventData): CodegenResult => {
  const node: SceneNode = eventData.node;

  // Initialize the array to hold all text strings
  let textStrings: string[] = [];

  // Check if the node has a 'findAll' function
  if ("findAll" in node) {

    // Find all text nodes, and return their content
    textStrings = node
      .findAll((childNode) => childNode.type === "TEXT")
      .map((textNode: SceneNode) => {
        const text: TextNode = textNode as TextNode;
        return text.characters;
      });
  }

  // Initialize the JSON object to hold the text strings
  let jsonStringsDictionary: {
    [key: string]: {
      string: string;
    };
  } = {};

  // Convert each string into a JSON entry
  for (const textString of textStrings) {

    // Convert the string to a suitable format for a JSON key
    const jsonKey = createJsonKey(textString);

    // Add the string to the JSON object
    jsonStringsDictionary[jsonKey] = { string: textString };
  }

  // Return the codegen result
  return [
    {
      language: "JSON",
      code: JSON.stringify(jsonStringsDictionary, null, 2),
      title: "i18n Dictionary",
    },
  ];
});

// Function to create a JSON key from a string
function createJsonKey(inputString: string) {
  return inputString.toLowerCase().replace(/\s/g, "_");
}
Here's how the above example would appear in the Inspect panel in Dev Mode: