Authentication
When you make requests to endpoints in the Figma REST API, you must authenticate the requests you are sending. You can authenticate requests to the Figma REST API in two ways:
-
Recommended: Create an OAuth app to use OAuth 2, which lets you make requests with access tokens that you obtain on behalf of the users of your app. The advantage of an OAuth app is that you can make requests on behalf of other users, and the requests themselves aren’t made using your personal Figma account. Additionally, if for some reason you leave a company or team, OAuth apps are able to be reassigned by team or organization admins.
Some parts of the REST API, such as the Activity Logs API and Discovery API, require you to use an OAuth app for authentication.
noteNote: If you’re working with the Embed API, you’ll also need to create an OAuth app even if you won’t be authenticating users.
-
Generate a personal access token for your Figma account. A personal access token allows you to make REST API requests using your personal Figma account.
For both OAuth apps and personal access tokens, you’ll specify what scopes you want to permit. Scopes define what resources the OAuth 2 access token or personal access token. For example, to read the content of files, you would grant the file_content:read scope to the OAuth app or personal access token.
OAuth apps
An OAuth app is used to implement authenticated access from your existing application to the Figma REST API. In this context, “existing application” can mean a lot of things. For example:
- A script or internal tool you use in your organization
- A platform or app that serves users of Figma
- Automation for developer systems
…and any other software interface that you want to use to access the Figma REST API.
An OAuth app enables you to use OAuth 2 for authentication. OAuth 2 is a web security protocol that allows 3rd party applications to establish a link between a user’s account and their access to a given API, on behalf of that user.
For example, suppose you have an app that lets users review library usage of their design system. You’d create an OAuth app, configure OAuth 2, exchange tokens on behalf of the user, and then use the access token for that user to make requests to the Library Analytics API. Because you’re acting on behalf of the user, the analytics data they get from the REST API would be limited to what’s available to their Figma account.
Regardless of whether your existing application is only used internally by your organization or is a public platform available generally to users, you’ll need to register an OAuth app in order to access the REST API.
To start using OAuth 2 to access the Figma REST API:
- Create and configure an OAuth app
- Authenticate users
- Use the token to make requests
- Refresh access tokens
Prerequisites
To use OAuth 2 to authenticate users, you’ll need a URL or endpoint on an external server that can be used as a callback for exchanging and refreshing tokens.
Important: We recently announced some updates for Figma's developer platform that impact requirements for registering OAuth apps. If you previously created an OAuth app, you will need to take some steps to update and publish it. To learn more, see Re-publish OAuth Apps.
Create an OAuth App
Creating an OAuth app lets you use OAuth 2 to establish links between existing Figma user accounts and your application, which allows you to access data on the user's behalf with Figma's APIs.
To create an OAuth app:
-
Click My Apps in the top toolbar, or go to figma.com/developers/apps.
-
In the upper-right corner of the page, click Create a new app.
-
Enter a name for your OAuth app, and select a team or organization. The OAuth app must be associated with a team or organization.
noteNote: Users of your application don’t need to be a part of the team or organization you select.
-
Click Create.
-
Copy the Client ID and Client Secret for your OAuth app and store them securely. This is the only opportunity you have to obtain the Client Secret. The secret is required for token exchange and refreshing access tokens.
-
Click Done.
Your OAuth app is created in a draft state and the configuration modal for your OAuth app appears. Continue with the next steps to configure your OAuth app.
Draft, private, and public OAuth apps
OAuth apps can be in a draft state, private, or public.
- When you create an OAuth app, it starts in a draft state. While in draft, you and admins for your plan can test your OAuth app. The app can’t be used to make requests on behalf of other users, including those in your team or organization.
- Public OAuth apps can be used to make requests on the behalf of any user that authorizes with your app. When you publish a public OAuth app, Figma reviews it. When Figma approves your public OAuth app, you can then start authorizing users.
- Private OAuth apps can be used to make requests on behalf of users in team or organization you associated your app with when you created it. Unlike public OAuth apps, private OAuth apps don’t require review by Figma when you publish them.
You’ll select whether your OAuth app is private (default) or public when you configure it.
Configure an OAuth app
You can configure your OAuth app:
- Immediately after you create the OAuth app
- Any time while the OAuth app is in a draft state
- Any time after you’ve published the OAuth app. In the case of published public apps, changes to configuration will require your OAuth app to be re-reviewed.
You’re not required to configure your OAuth app until you’re ready to publish it privately (only for your team or organization) or publicly (available to users of Figma in general). However, you won’t be able to set up OAuth 2 or start making requests to the Figma REST API with your application until you finish the configuration steps.
If you start to configure your app and decide to come back later, changes you’ve made will be saved.
Configuring and publishing
To configure and publish your OAuth app, you go to figma.com/developers/apps and click an OAuth app to go through the configuration flow. During the flow, you choose whether your OAuth app is private or public and select the scopes your OAuth app needs. You publish your app at the end of the configuration flow.
If your OAuth app is public, it undergoes review by Figma. Once approved, you’re be able to use your OAuth app to authenticate users.
You can close the configuration flow at any time and your OAuth app will remain in draft if it hasn’t been previously published.
The following section describes the steps in detail.
To configure a OAuth app:
-
In the list of your OAuth apps at figma.com/developers/apps, click the OAuth app that’s in a draft state. If you’ve just created your OAuth app, the configuration modal will already be open.
The configuration modal has several pages:
-
General
-
OAuth credentials
-
OAuth scopes
-
Embed API
noteNote: These steps cover working with the REST API. For an explanation of the Embed API page, see the Embed API documentation.
-
Publish (for private apps)
-
Testing instructions (for public apps)
-
Review and submit (for public apps)
-
-
On the General page you can change the name you entered when you created the app and upload a logo.
-
On the OAuth credentials page, click Add a redirect URL and add one or more redirect URLs for your OAuth app.
Redirect URLs correspond to the callback URLs you use for exchanging and refreshing tokens. The Figma REST API will only allow token exchange with the redirect URLs you specify.
-
On the OAuth scopes page, select one or more scopes that you want to use for your OAuth app. For example, if your application needs to read the layers and content of a Figma file, select the
file_content:readscope under Files.importantImportant: This step is critical for ensuring your OAuth app correctly serves your users. You need to make sure the scopes you select for your app match the endpoints you’re making requests to.
-
On the Publish page, select whether you want your app to be public or private.
tipIf you select Public and you want to publish your app to the Figma Community, select List this app on community. For detailed steps, see Publish an app to the Figma Community
-
On the Describe your app page, add the required logo and description for your OAuth app.
-
On the Review scopes page, review the scopes that you selected for your OAuth app on the OAuth scopes page.
-
For private OAuth apps, click the Publish button in the lower-right corner of the configuration modal. You’re finished! Your private OAuth app is published and available use in your team or organization.
For public OAuth apps, continue to the next step.
-
On the Testing instructions page (public OAuth apps only):
- Enter all the steps that are required for in order for the OAuth app reviewer to successfully test your application and understand its features.
- Optionally, add a link to a testing video.
- If necessary for working with your application, provide a free trial URL or login credentials that the OAuth app reviewer can use to access your application.
-
On the Review and submit page (public OAuth apps only), read the summary of what to expect during the review process. You should also read the Figma Community Apps Review Guidelines to ensure your application meets the requirements.
When you’re ready, click the By submitting my app for review… checkbox, and then Submit for review.
You’re done! When your OAuth app has been reviewed and approved, you’re ready to use your OAuth app to authenticate users and make REST API requests on their behalf.
Example: Public OAuth app submission
Let's walk through a good example of a detailed public OAuth app submission.
Example app: TaskBridge is a project management platform that syncs Figma comments and dev resources with external task tracking systems like Jira, Linear, and Asana. It allows teams to manage design feedback and development handoffs from within their existing project management workflows.
Here's how the configuration fields would be filled out for this example:
General page:
- App name: "TaskBridge - Manage Comments & Resources"
- Logo: A 512x512 pixel logo for the TaskBridge brand
OAuth credentials page:
- Redirect URLs:
https://app.taskbridge.io/auth/figma/callbackhttps://staging.taskbridge.io/auth/figma/callback(for testing)
OAuth scopes page:
current_user:read: To identify users and associate their Figma activity with their project management accountsfile_comments:read: To synchronize comments in Figma files with the comments in TaskBridge, and notify users when a comment is addedfile_comments:write: To post status updates and responses back to Figma from the external platformfile_dev_resources:read: To pull in dev resources and specs attached to designs so they are stored in a centralized location for TaskBridge usersfile_dev_resources:write: To update dev resources with implementation status and technical notesfile_content:read: To understand file context and link comments to specific design elements
Describe your app page:
- Description: "TaskBridge seamlessly connects your Figma design workflow with your project management tools. It automatically syncs comments, dev resources, and design feedback between Figma and platforms like Jira, Linear, and Asana, ensuring your team stays aligned throughout the design-to-development process."
Testing instructions page:
- Testing steps:
- Visit https://taskbridge.io and create a free account
- Connect both your Figma account and your preferred project management tool (Jira/Linear/Asana)
- Select a Figma file with existing comments and dev resources
- Configure sync rules (e.g., "Create Jira ticket when comment mentions @dev")
- Add a comment in Figma mentioning development work to see the automatic ticket creation
- Update the dev resource status in TaskBridge to see it reflected back in Figma
- Testing video: A 3-minute demo that shows the bi-directional sync in action
- Trial access: Free 14-day trial available - no credit card required. Test credentials for Jira sandbox available upon request.
This example demonstrates how a real-world OAuth app would be configured for review by Figma, with appropriate scopes for its functionality and clear instructions for reviewers.
Authenticate users
When you’re ready to authenticate users, you need to do the following:
- Provide an authentication URL to the user. This step gets you the authentication code you’ll need in order to generate an access token for the user.
- Exchange the resulting authentication code for an access token. The access token you receive from this step is what you’ll use to make API requests.
Provide an authentication URL
To get the access token you’ll use to make requests to the Figma REST API on behalf of a user, you need to provide the user an authentication URL. When the user follows the URL, they’ll have the opportunity to review what scopes your OAuth app is requesting, and to consent to giving your application access.
The exact method you use to provide the URL is up to you. For example, you could provide the URL as a part of a web app’s workflow for connecting to Figma.
Important: Regardless of how you provide the URL itself, the user must access the authentication URL using a web browser, not an embedded WebView inside your application. WebView access to the Figma OAuth flow is not supported.
To authenticate a user, ask them to visit the following URL:
GET https://www.figma.com/oauth?
  client_id=:client_id&
  redirect_uri=:callback&
  scope=:scope&
  state=:state&
  response_type=code
The following table describes the parameters in the URL.
| Parameter | Description |
|---|---|
| client_id | The client ID of your OAuth app. |
| redirect_uri | This must be one of the redirect URLs you set as a callback for your OAuth app. The auth page will call this URL if the user allows access to your app. |
| scope | A space-separated or comma-separated list of scopes that you need for your application. Scopes determine which endpoints can be accessed. For example, if your application needs to read files and post comments, your scope value would be file_content:read,file_comments:write. You can provide the scope query parameter a subset of the scopes you selected when you configured your OAuth app. |
| state | This is a value that you should randomly generate and store. When we call back to your callback endpoint, you should check that the state value we pass back to you matches the state value that you initially used in your request. |
| response_type | Currently we only support the authorization code flow for OAuth 2, so the only valid value here is code. We may support other values in the future. |
| code_challenge | Optional but highly recommended. If you are using PKCE (proof key for code exchange), you must provide a code challenge. Only the S256 method for generating the code challenge is supported. |
Once the user navigates to this address, they will see a screen like the following:
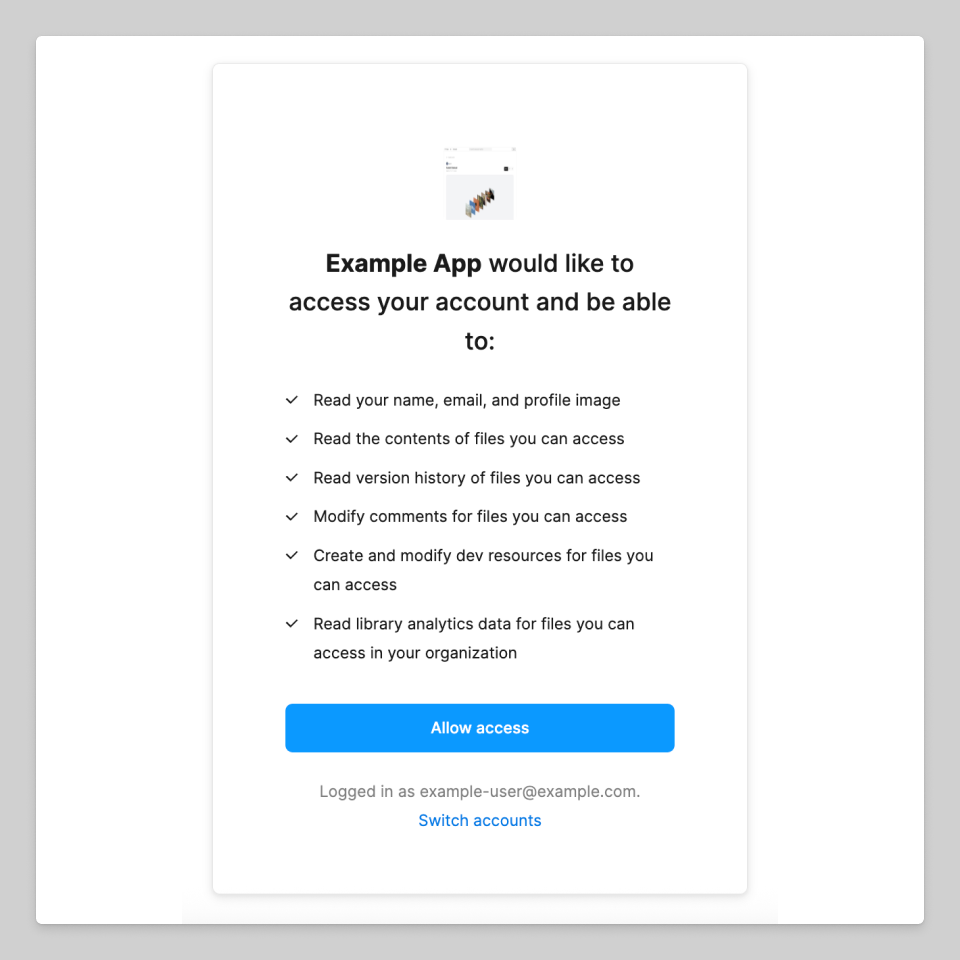
If the user rejects the request, no callback is triggered.
When the user clicks Allow access, the client is redirected to the callback that was passed for redirect_uri.
For example, suppose the URL you provided for redirect_uri was the following: https://example.com/oauth/callback. The expected callback request would look like: https://example.com/oauth/callback?code=:code&state=:state
Where:
- :code is the authentication code that can be traded in for an access token.
- :state should correspond to the state value you provided in the authentication URL.
You should check that the state value passed back to you is the same as the one originally generated.
Exchange the authentication code for an access token
After the user allows access and you get the activation code from the response, you can pass the code back to the OAuth API to get the user's access token.
Note: Authentication codes expire 30 seconds after being issued. You must exchange the code for an access token by calling https://api.figma.com/v1/oauth/token within 30 seconds of the user completing the OAuth grant. You will receive an error if you attempt to exchange the code after this window, even if the code appears valid.
To get an access token, make a POST request to https://api.figma.com/v1/oauth/token. Include the Content-Type: application/x-www-form-urlencoded header.
For Figma for Government, the URL is https://api.figma-gov.com/v1/oauth/token.
Use the HTTP Basic Authentication scheme to send your client_id and client_secret in the request. First, concatenate your client ID and client secret with a colon: client_id:client_secret. Then, Base64 encode the resulting string and include it in the Authorization header. The header should be formatted like:
Authorization: Basic <BASE64_ENCODED_CLIENT_ID_AND_SECRET>
The request body should use the following format:
redirect_uri=:callback&code=:code&grant_type=authorization_code
Make sure to URL-encode the parameter values. The list of parameters is:
| Parameter | Description |
|---|---|
| redirect_uri | This must match the must match the redirect URI originally provided, and code must match the authentication code provided to your callback. |
code | This is the code given to you in the callback request. |
grant_type | This must be authorization_code. |
code_verifier | If you used the PKCE flow, you must provide the verifier that you used to generate the code challenge. |
If the parameters are valid, you will receive the user access token and token expiration (in seconds) in a JSON response with the following structure:
{
  "user_id_string": <USER ID for the user who authorized the app>,
  "access_token": <TOKEN>,
  "token_type": "bearer",
  "expires_in": <EXPIRATION (in seconds)>,
  "refresh_token": <REFRESH TOKEN>
}
Note: This response may contain a numeric user_id property. This property is deprecated. Please use user_id_string instead. Figma user IDs appear to be numeric, but many cannot be represented in common number formats such as JavaScript numbers and Go's float64.
Use the OAuth 2 Token
Once you have obtained the user access token, using it is very similar to the way you use personal access tokens.
When you call the API, pass a Bearer authorization header like so:
$ curl -sH 'Authorization: Bearer <TOKEN>'
    'https://api.figma.com/v1/files/...'
    | python -m json.tool
{
  "components": {},
  "document": {
    "children": [
      {
        "backgroundColor": {
          "a": 1,
          "b": 0.8980392156862745,
          "g": 0.8980392156862745,
          "r": 0.8980392156862745
        },
        "children": [],
        "exportSettings": [],
        "id": "0:1",
        "name": "Page 1",
        "type": "CANVAS",
      }
    ],
    "id": "0:0",
    "name": "Document",
    "type": "DOCUMENT",
  },
  "schemaVersion": 0
}
Refreshing tokens
By default, access tokens expire after 90 days. If your integration is long-lived, you'll need to regularly replace stored tokens. You do this using a refresh token.
A refresh token can be reused as many times as necessary to obtain a replacement access token. Figma only maintains one access token per app for a user, so when you refresh an access token, the previous access token stops working. You'll need to ensure the latest access token is always applied for the user of your app.
To refresh an access token, make a POST request to https://api.figma.com/v1/oauth/refresh with the following header: Content-Type: application/x-www-form-urlencoded
Similar to when you first obtain access tokens, use the HTTP Basic Authentication scheme to send your client_id and client_secret in the request. First, concatenate your client ID and client secret with a colon: client_id:client_secret. Then, Base64 encode the resulting string and include it in the Authorization header. The header should be formatted like:
Authorization: Basic <BASE64_ENCODED_CLIENT_ID_AND_SECRET>
Make sure to URL-encode the parameter values and place them in the request body. The list of parameters is:
| Parameter | Description |
|---|---|
refresh_token | The refresh token you received during the initial authorization flow. |
If the parameters are valid, you will receive the user access token and token expiration (in seconds) in a JSON response with the following structure:
{
  "access_token": <TOKEN>,
  "token_type": "bearer",
  "expires_in": <EXPIRATION (in seconds)>,
}
Personal access tokens
A personal access token gives the holder access to an account through the API as if they were the user who generated the token.
Generate a personal access token
- Login to your Figma account.
- From the file browser, click the account menu in the top-left corner and select Settings.
- Select the Security tab.
- In the Personal access tokens section, click Generate new token to open the configuration modal.
- Set the expiration and scopes for the token. The scopes will determine which endpoints the token has access to.
- Click Generate token. This will be your only chance to copy the token, so make sure you keep a copy of this in a secure place.
From the Security tab of your account settings, you can hover over the name of an existing token to see what scopes it has. You can also see when the token was last used (give or take a few minutes). If you see any activity on a token that you did not initiate, revoke the token immediately. Revocations are instant and can be made at any time.
Use the personal access token
You can now use the token to make requests to the Figma API. You can do so by passing the token to the API in the X-Figma-Token header of your request.